Arms of Subjugation: Asset Pack
Animation Rigging in ClipStudio - For Dummies


Animation Rigging with ClipStudio - For Dummies
- BrushingBlooms
This is an art and style development log. I do not have a background in programming thus this info will only pertain to the artistic choices of the Arms of Subjugation. This is the way I've found easiest to approach asset creation to create a cohesive "style" where everything looks like it belongs together.
The theme for the Pirate Software 16 Jam was "You are the Weapon" and we chose to go with the literal interpretation of the PC being a weapon that possess people. We had a hunger to sink our teeth into a roguelite fighting game so we quickly had a direction to follow. Because our main character was a sword possessing different npc’s we needed to make multiple characters with similar movesets very quickly, e.g.
I had seen tutorials from Clip Studio Paint on how to use keyframe animations and rigging but it took another 10hrs or so of tinkering to find an effective workflow for this project.
Part One: Designing animation templates for your OCs! | Dadotronic
Part Two: How to make a rig from sliced character parts! | Dadotronic
Part Three: How to keyframe animate in Clip Studio Paint | Dadotronic
While this isn’t true blue rigging this was simple enough that I could learn and implement it within the 2 week period and reuse the same ‘skeleton’ to export different npc’s quickly after updating the individual pieces of the rig.
Step 1: Create Your Character Base
Think of your base character like a puppet—this is the model you’ll animate and reuse for different NPCs.
For our project, we split the character into 14 parts (or 8 parts if you skip asymmetry, more on that later). This includes body segments, limbs, and props like a sword.
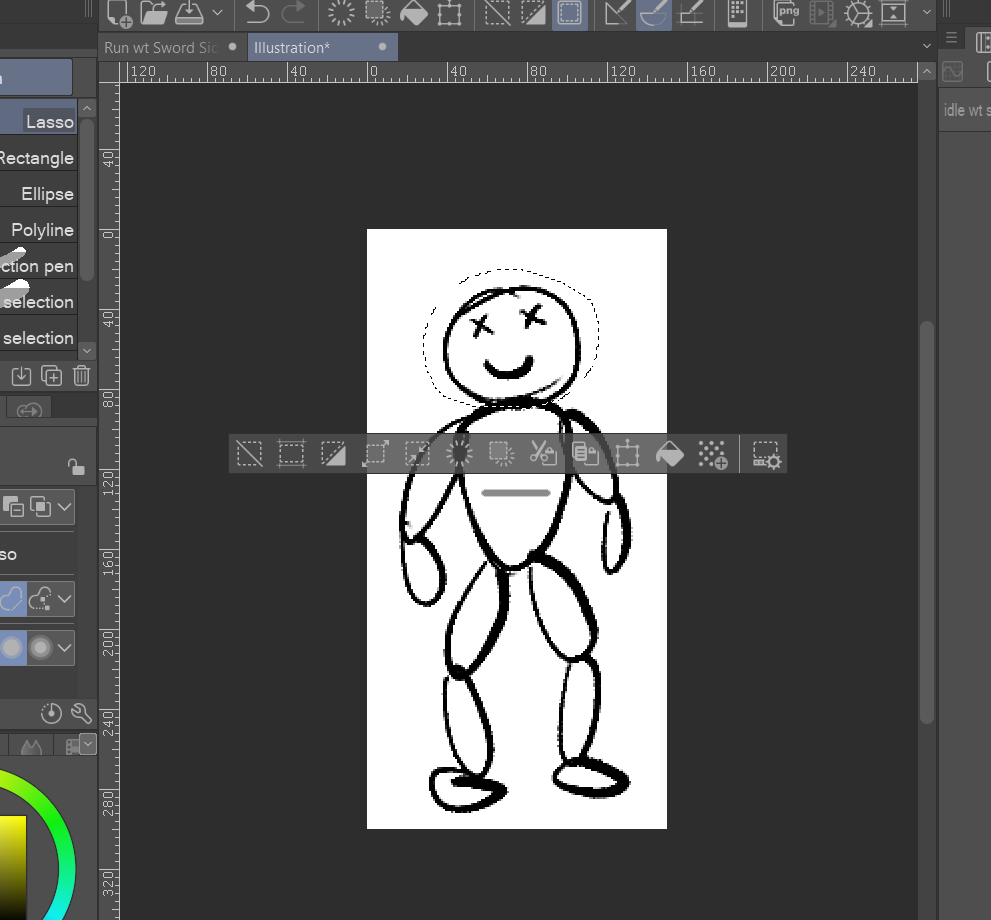
Step 2: Segment the Puppet
In Clip Studio:
- Select the body part you want.
- Hit Copy.
- Go to File > New from Clipboard.
Make sure each piece has plenty of space around it. You really don’t want to be adjusting canvas sizes later—it’s a massive pain.
Then, save each part as its own .clip file. This is super important because you’ll be editing them individually later. Also: Don’t move these files around in your folders after saving—doing so breaks the live file links inside your animation project.
Step 3: Set Up the Animation File
Now we move on to animating.
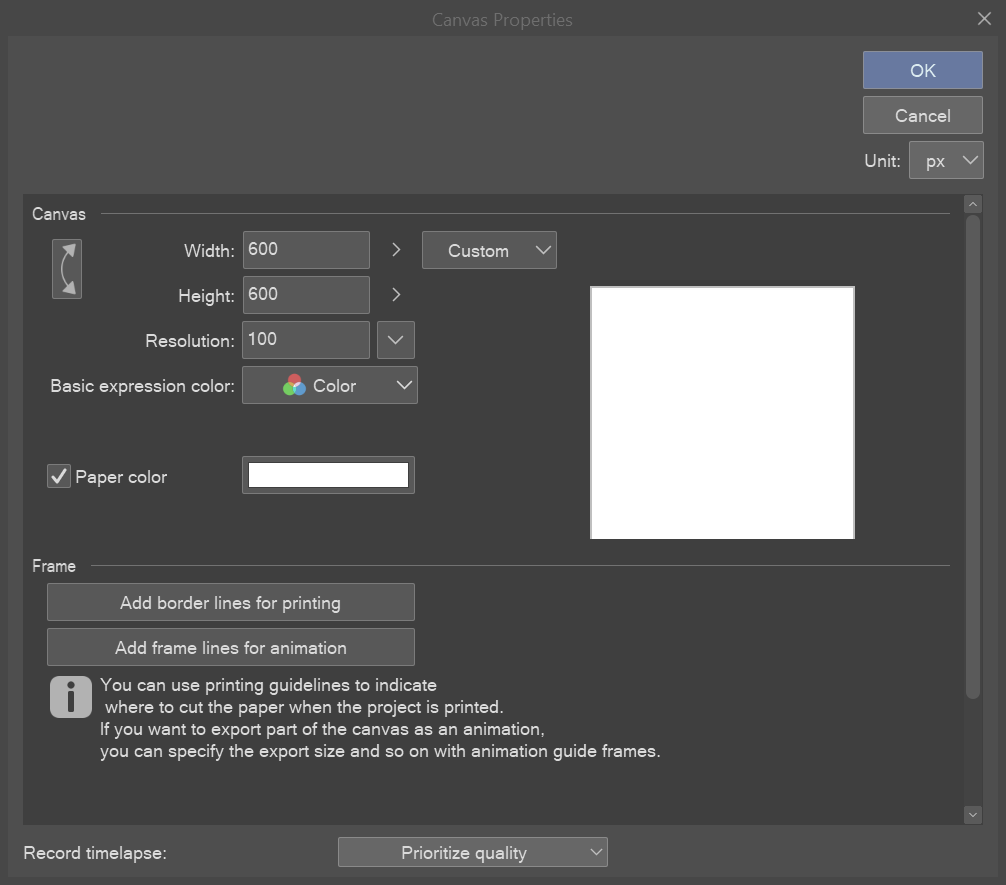
A few things to keep in mind:
-Our characters were about 200px so the animation canvas gets pushed to 600px. This gives the characters lots of breathing rooms for their movements. It’s way easier to crop dead space later than to try expanding the canvas mid-project.
Step 4: Assemble your puppet
Instead of designing our animations from scratch, we used the Top Down Template Asset Pack by OboroPixel (available on Itch.io). We scaled it up and matched our puppet to the poses in the template.
Import your puppet pieces as Live Files into a new animation project. We used symmetrical character designs, so we only needed to Import one half of the puppet then duplicate and flip the appendage segment.
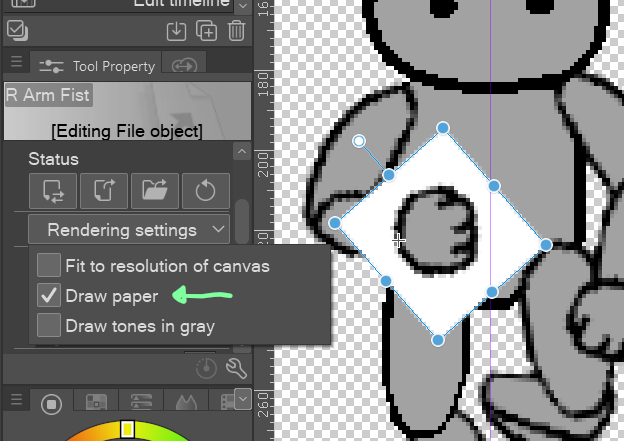
When first imported the segments will be imported with white backgrounds. you will need to individually go through and uncheck this option under the Object tool
Next, we matched up the segmented pieces to our template from OboroPixel.
Here it's important to match your anchor points for each segment. The rough overview is that you are moving the rotating point of each segment to connect with the end of the last segment
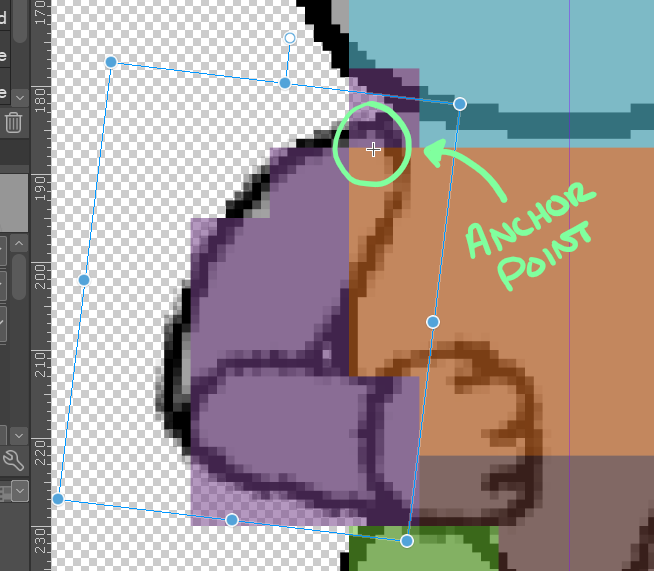
Ex. moving the anchor point to the shoulder of our puppet so the rotation of our upper arm pivots around the shoulder
Step 5: Keyframing the Animation
Now we’re getting into the animation where we are using keyframes, for the dummies like me all this means is that we want this puppet part to be in this position on the canvas at this time. Clip Studio will generate the path that the puppet part takes to move it to its keyframe spot
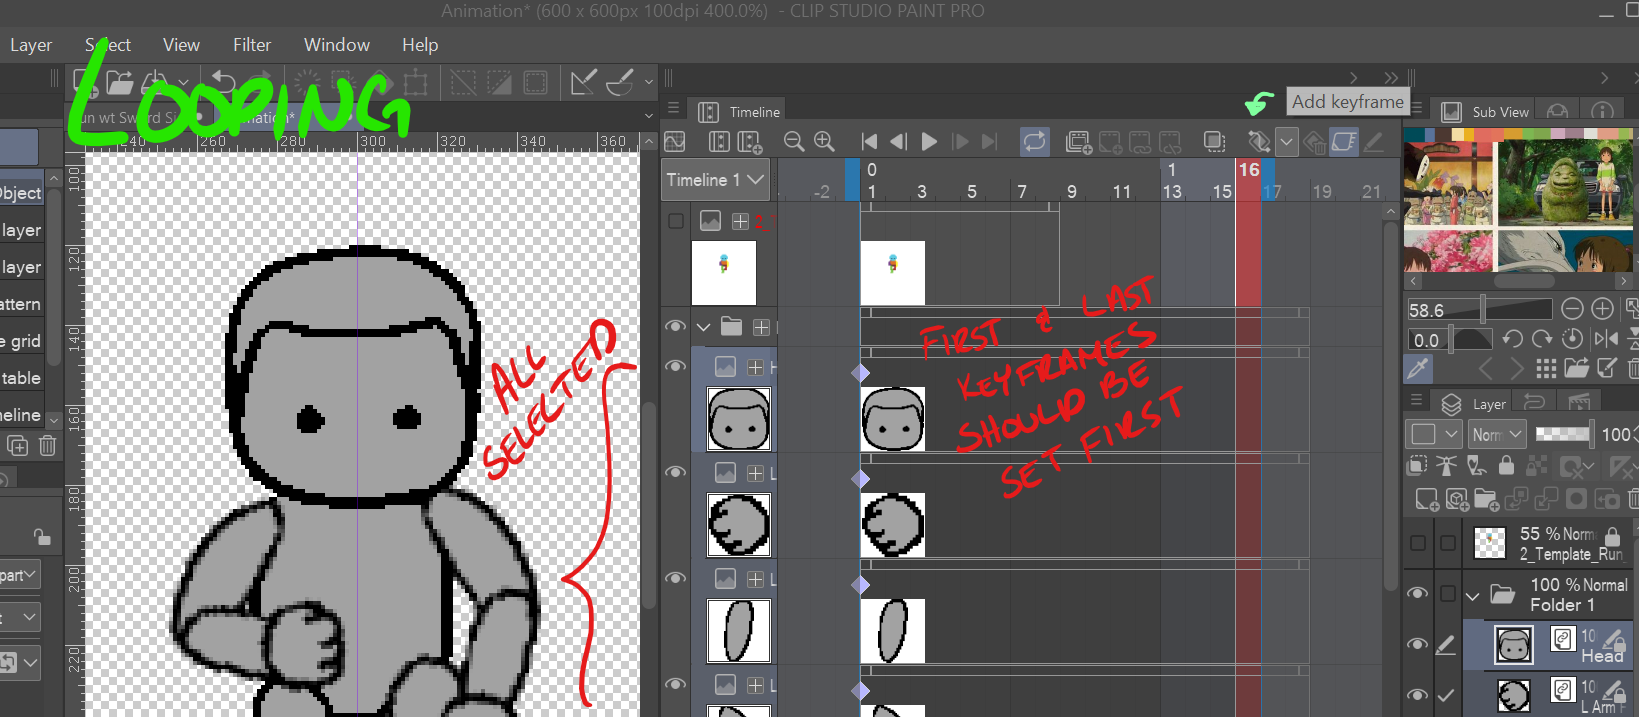
- Enable keyframes on every puppet part and the template
- Set the first keyframe for each piece and template
- If you're doing a looping animation (like walking or idle), drag that first keyframe to the end of the timeline, then reset the original starting frame. This ensures your animation loops seamlessly.
Now just go frame-by-frame and reposition each body part to match the template. Clip Studio will auto-generate a new keyframe every time you move a piece on a new frame

Step 6: Exporting & Reusing
Once the animation’s done:
- Export all frames as images to build a sprite sheet later.
- Instead of creating a new animation file for each move, just make a new timeline. That way, your puppet parts carry over automatically, and you can jump into the next animation right away.
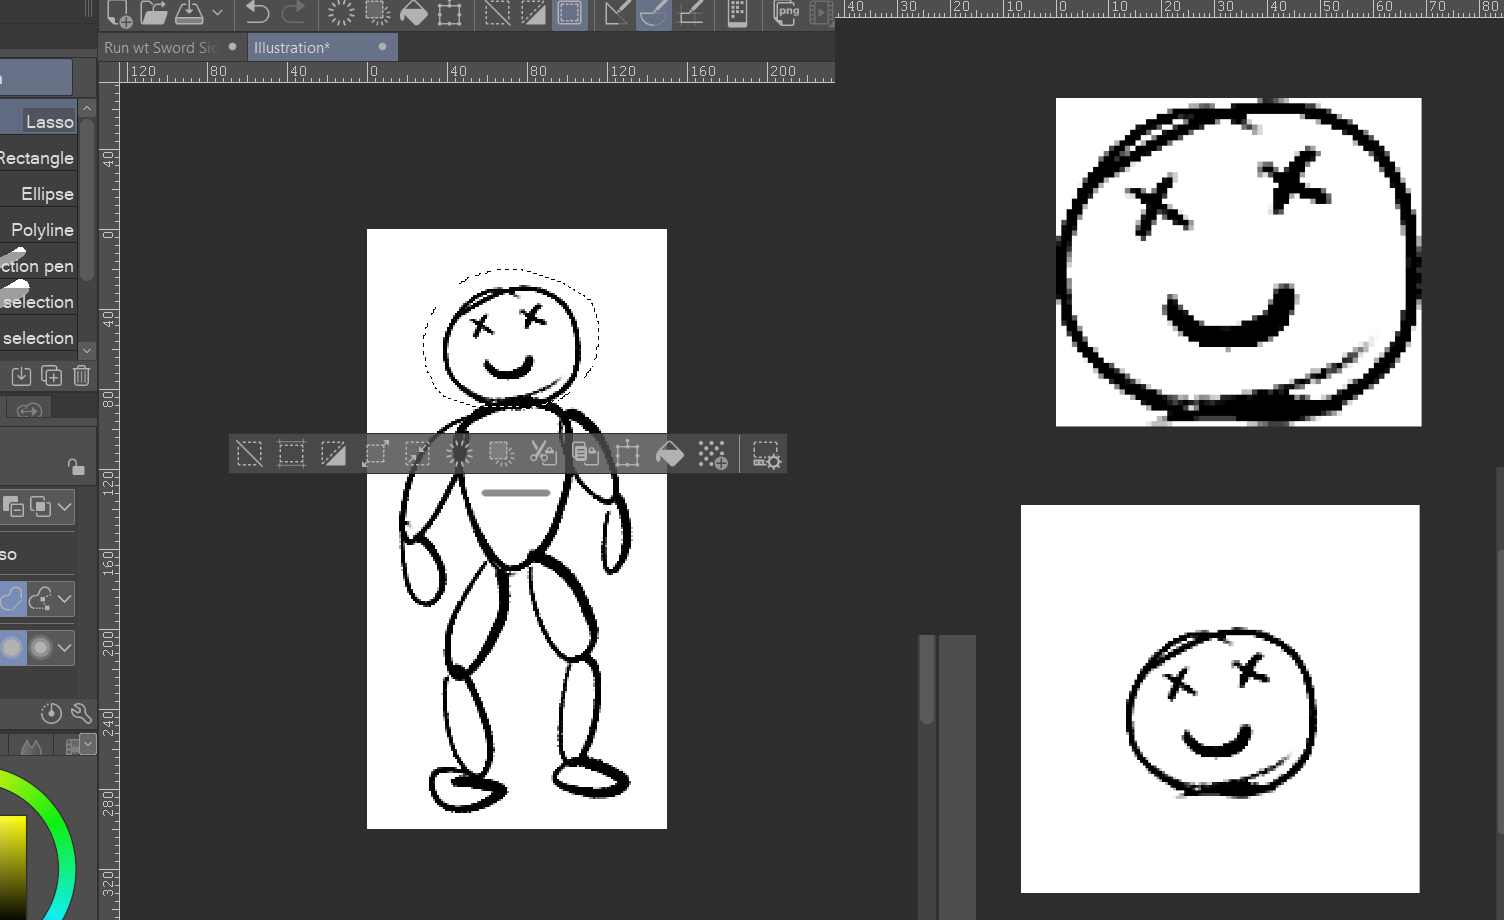
Step 7: Make Your NPC Variants
Now for the cool part: Open your puppet .clip files and start tweaking them to create different NPCs—change colors, outfits, accessories, etc.
When you go back to your animation project, everything auto-updates. Just re-export the new frames, and boom—you’ve got a new character using the same animations.
Final Thoughts
So yeah—this isn’t the best way to rig in Clip Studio Paint, but it’s a way that worked really well for us during a short, chaotic game jam. It let us quickly build multiple animated characters without having to redraw every frame.
If you're working on a small project or solo dev team, I hope this helps you save time and stay sane.
Leave a comment
Log in with itch.io to leave a comment.